A first stained-glass suncatcher is easier to control than a large panel: fewer glass pieces, shorter solder seams and a lightweight finished object. For your first project, use a small pattern with gentle curves, several colors of compatible art glass and clear positions for its hanging points. Work from a full-size pattern rather than improvising glass shapes at the soldering bench.
This guide follows the copper-foil method. It is not the same workflow as a traditional lead-came window. You score and break the pieces, refine them on a wet grinder, wrap each clean edge in adhesive copper foil, fit the glass on a heat-safe surface and solder the copper seams. Check tool manuals and take particular care with glass fragments, heated flux and any lead-containing solder.
Materials and workspace: what matters before the first cut
A practical starter kit includes an oil-fed glass cutter, running and grozing pliers, splash-controlled wet glass grinder, copper foil of a width suited to your glass thickness, a burnisher, a soldering iron with suitable tip, appropriate solder and flux, heat-resistant surface, a stable pattern, and hardware for hanging. Use safety glasses for cutting and grinding; keep food, drinks and children out of the work area. Choose local extraction or effective ventilation for soldering.
Do not select equipment solely by price. A stable grinder table and effective water delivery matter more than a long list of accessories. A small pattern with large segments reduces difficult curves. Transparent glass reveals the foil adhesive backing, so choose a foil backing color to suit the intended patina or final solder appearance.
Select a forgiving first pattern
Aim for a compact design whose shapes can be scored and broken without deep inside curves. Petals, radiating sun rays and simple geometric panes are popular because they create attractive color when backlit. Avoid an intricate illustrated face or tiny disconnected pieces: each sharp turn increases the risk of a bad break and may force you to buy additional glass.
Print the pattern full-size and number the shapes. Keep an untouched reference copy and separate individual cutting templates. If the glass has a texture or grain, decide how it should run before tracing. Check that the assembled object will have strong hanging attachment points; thin unsupported tips are poor places to hang weight.
Prepare the glass and safety area
Clear a flat working surface, place a glass-cutting mat or equivalent support and maintain a designated fragment container. Wear eye protection and closed shoes. Store lead-containing solder separately from household materials and wash hands carefully after handling; CDC identifies stained-glass work and soldering as potential lead-exposure activities.
Wet grinding helps suppress glass dust and removes sharp uneven edges. Never dry-grind glass with an ordinary dry power tool. Follow the grinder maker’s water and electrical instructions and keep outlets away from the wet area. Do not use a damaged cord or modify electrical equipment.
Step-by-step instructions
Step 1: Trace the full-size pattern
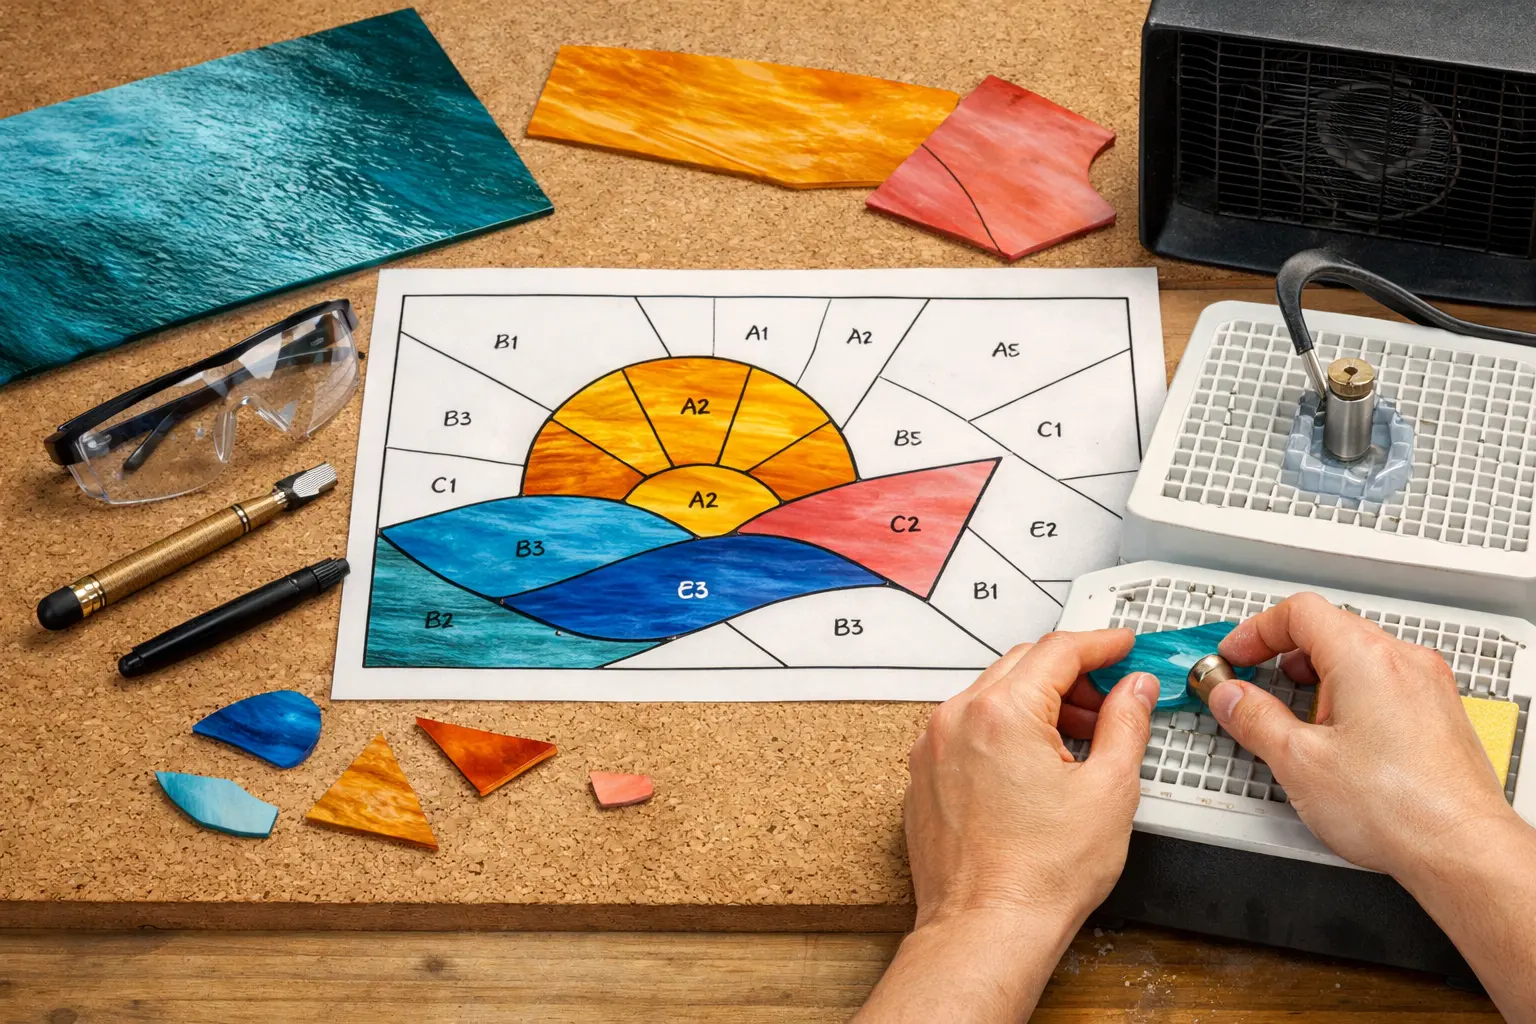
Lay out the pattern and label every piece before cutting. Match glass grain and color to the intended composition. Mark only the cut lines you can make reliably, and leave space on the bench for separated offcuts.
Step 2: Score the glass in a single controlled pass
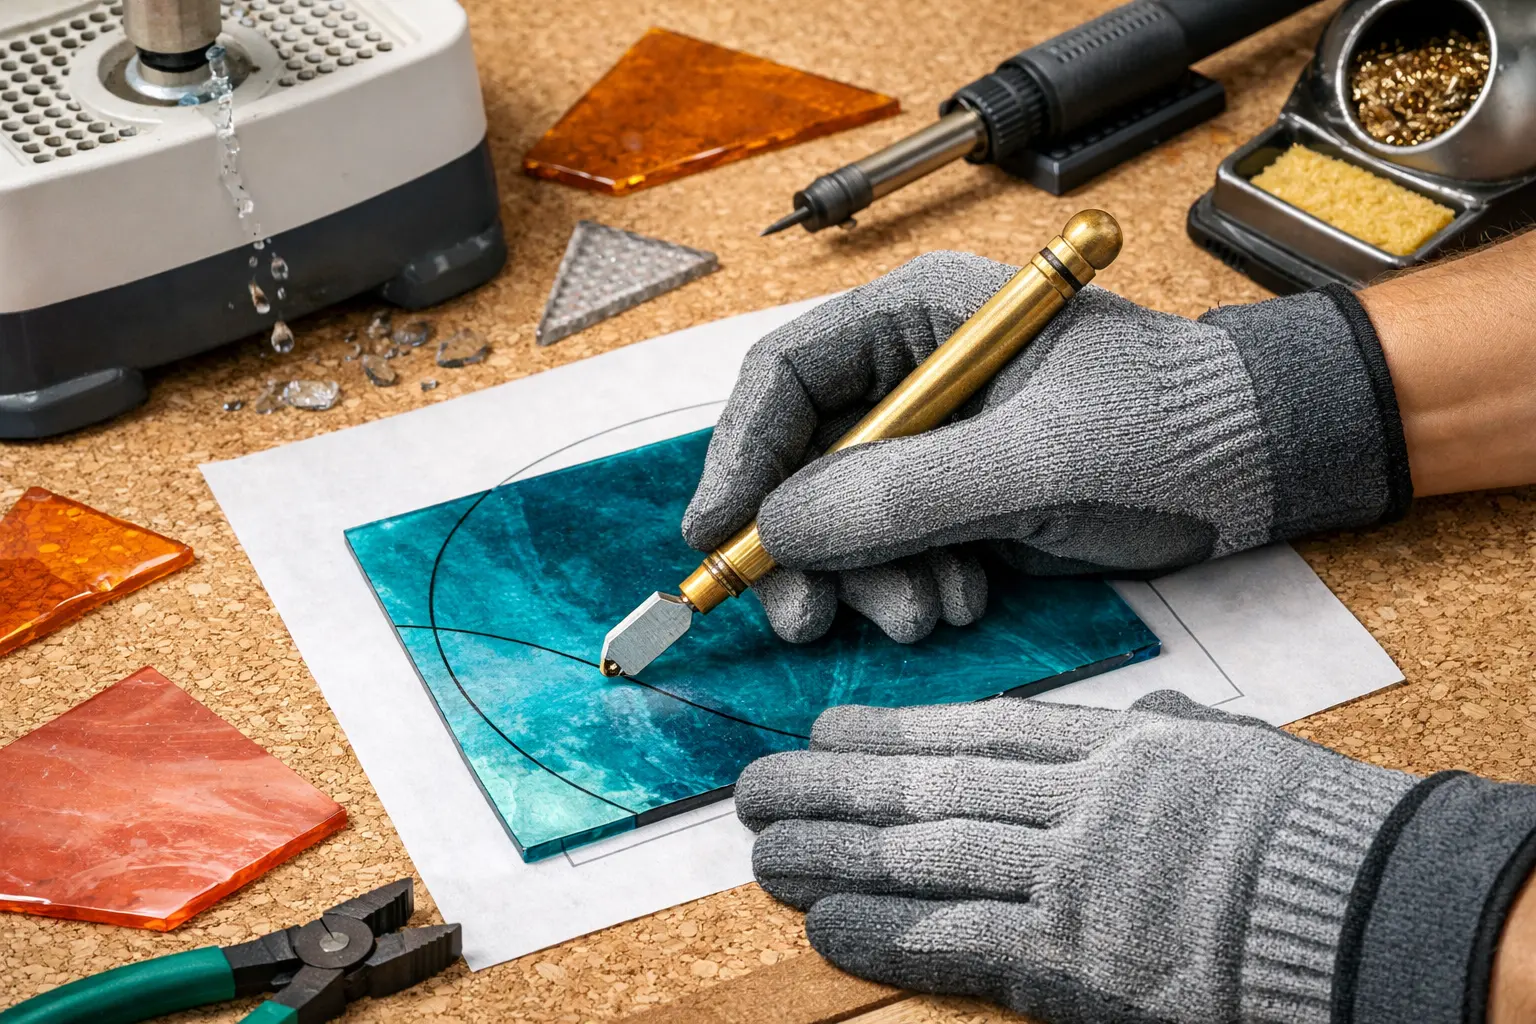
Support the glass and follow the planned line with a suitable cutter, using the recommended pressure and a consistent angle. Multiple passes over the same score can cause rough edges or unpredictable breaks. Wear eye protection and do not put your hands in the break path.
Step 3: Run and separate the scores
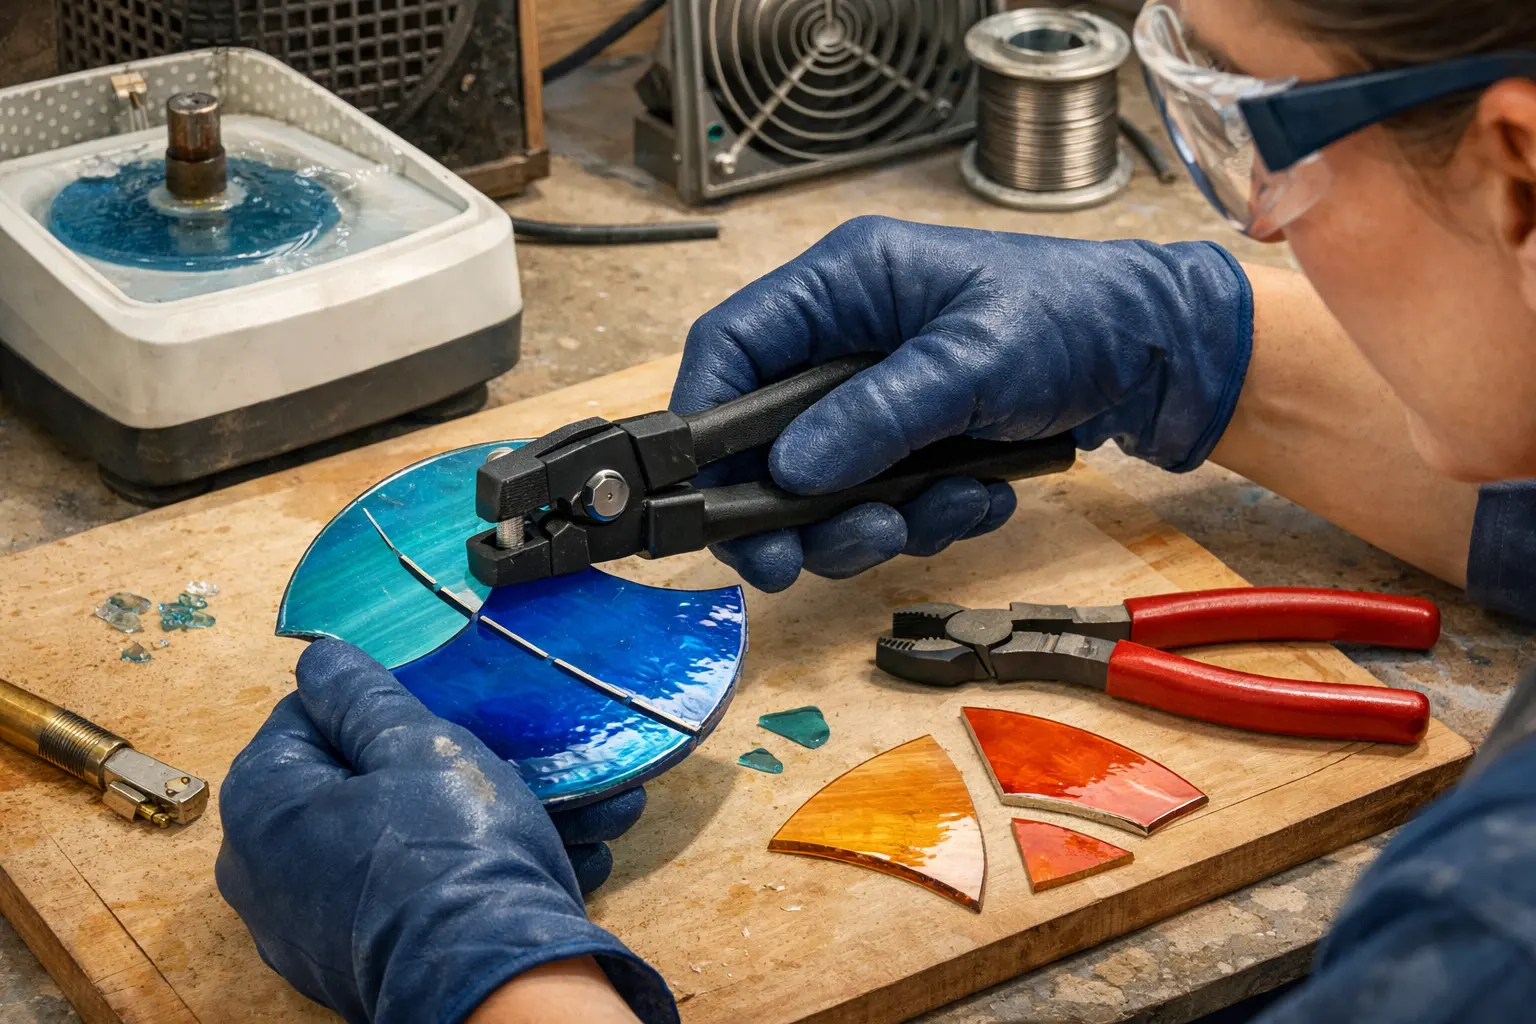
Use running pliers positioned over the score line, or appropriate grozing pliers for smaller corrections. Support the piece. If the curve is too tight, reconsider the cut plan and use shorter relief cuts rather than forcing a hard break.
Step 4: Wet-grind the edges to fit
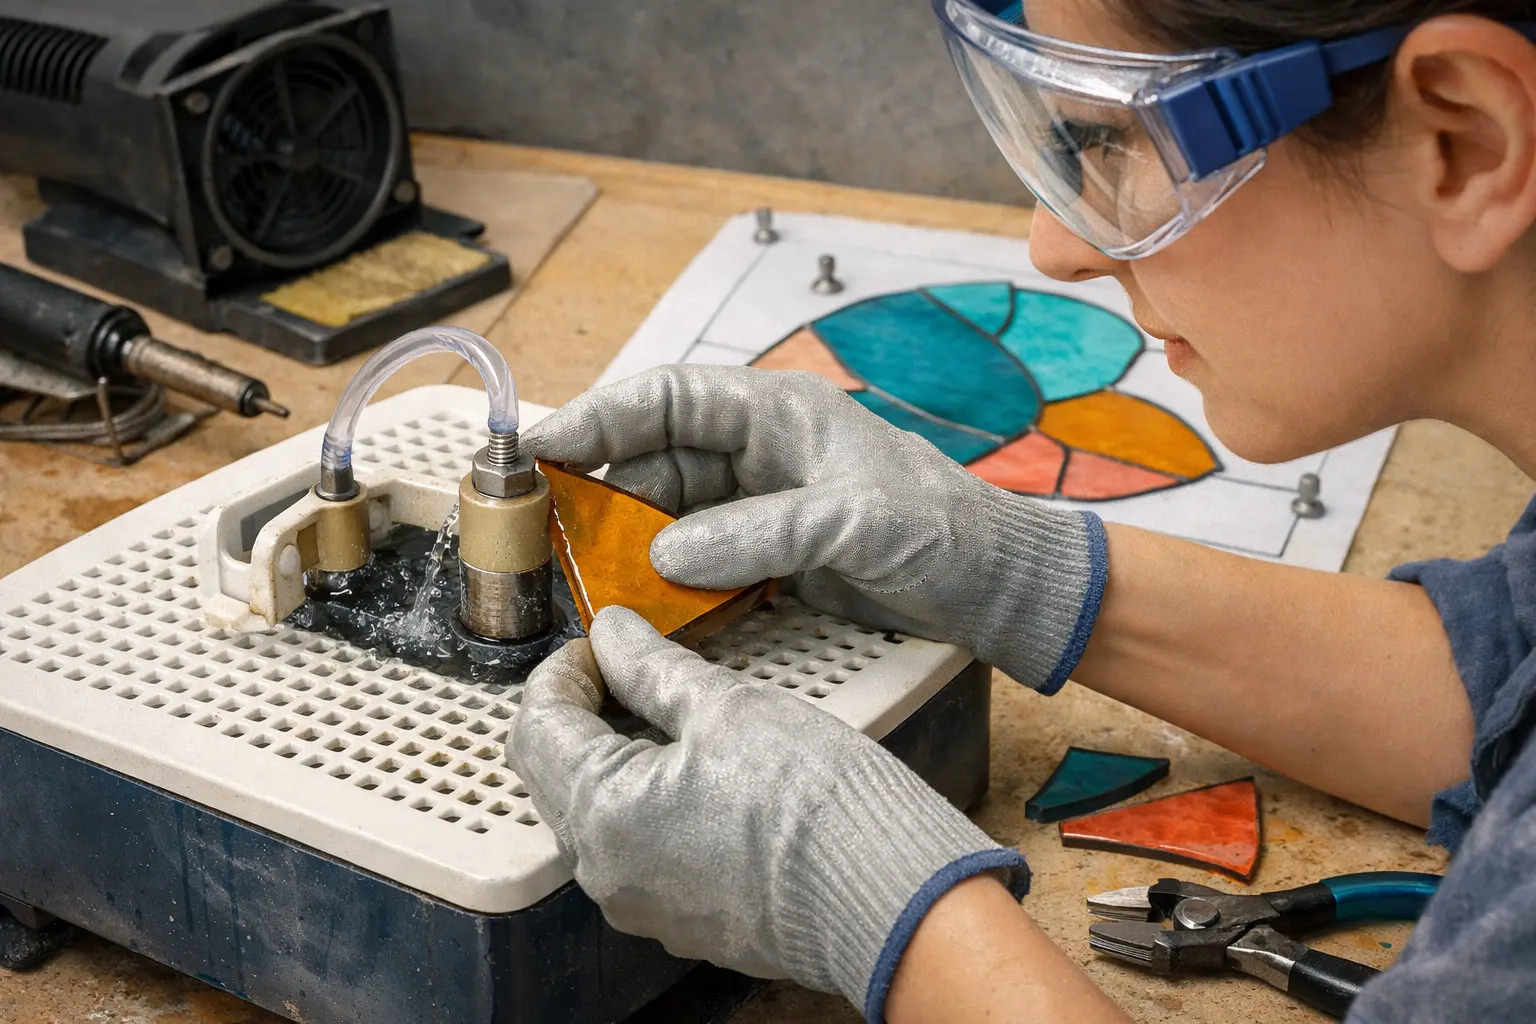
Use the manufacturer-approved water supply at the bit. Hold the glass securely and apply light pressure to remove small mismatches. Check fit against the full-size pattern repeatedly; grinding should refine the shape rather than replace careful cutting.
Step 5: Clean, foil and burnish each piece
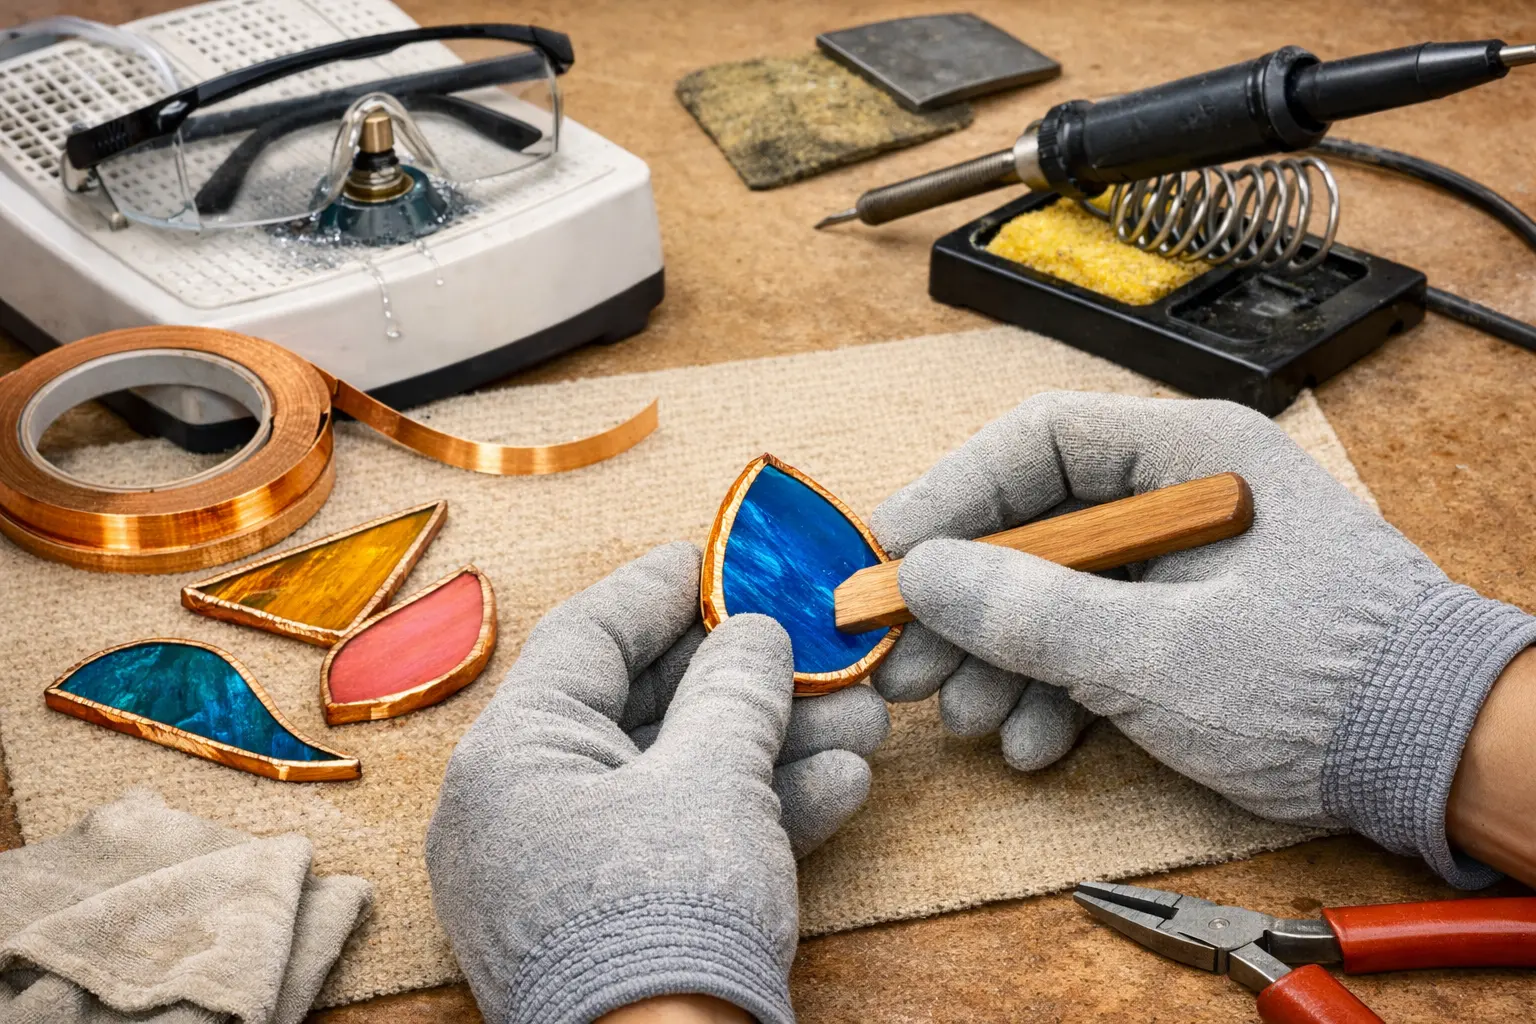
Wash away grinding residue and fully dry the edges. Center the foil evenly, overlap the ends neatly and burnish the foil firmly around both faces. Inspect and rework lifting edges before solder touches the piece.
Step 6: Align, tack and solder the assembly
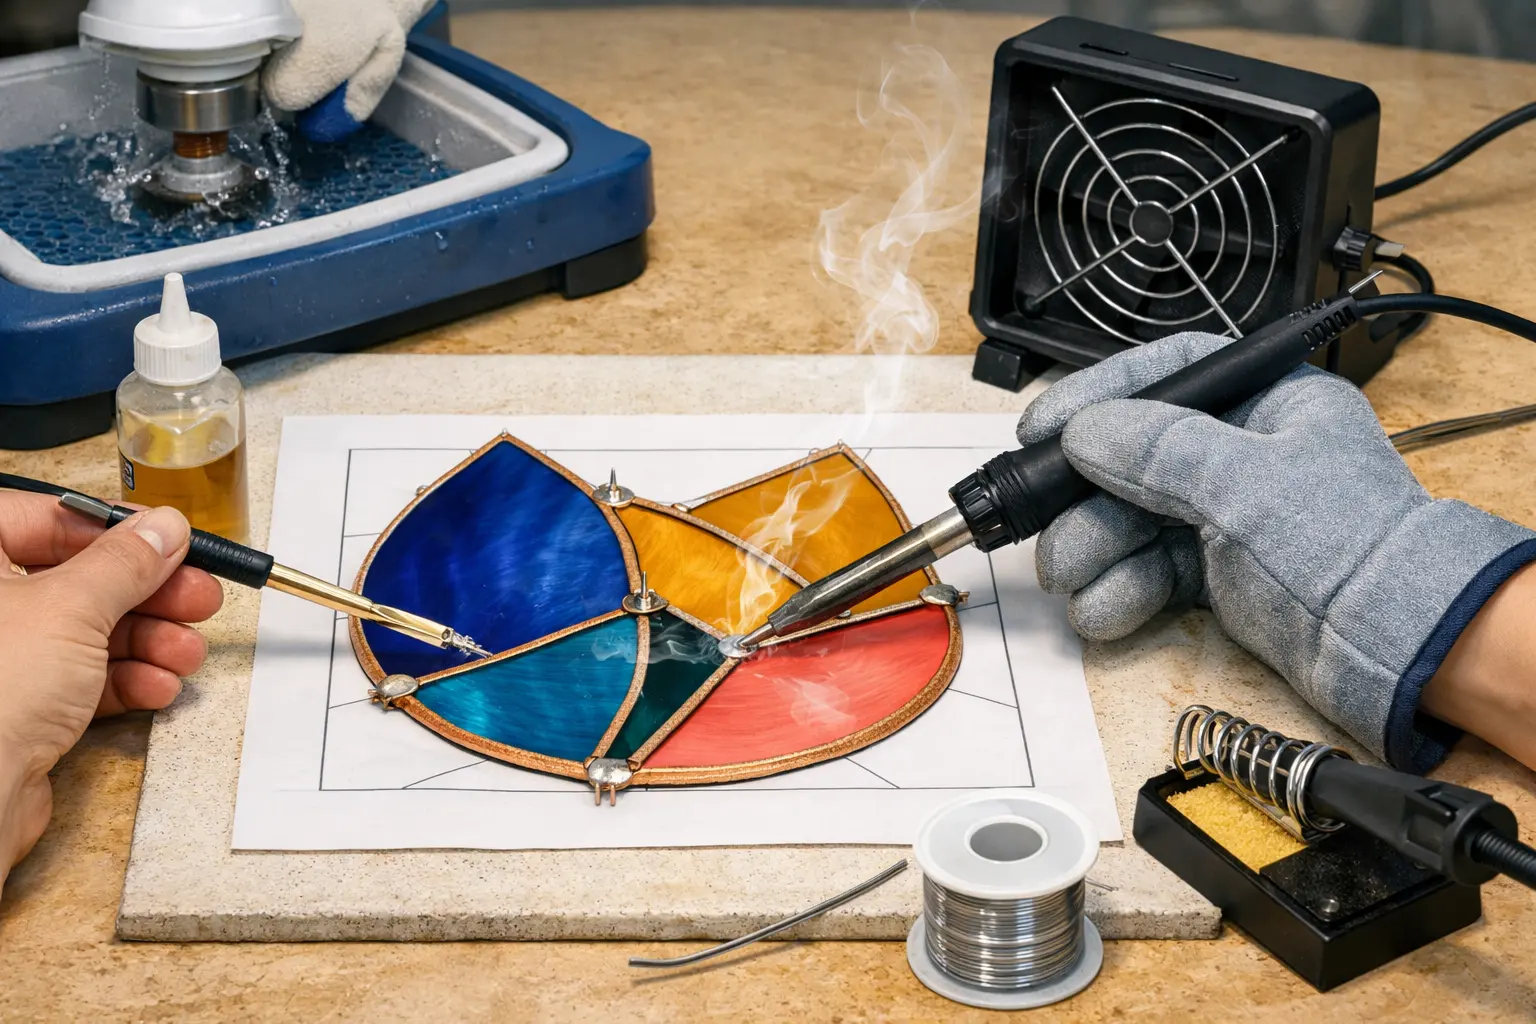
Place pieces over the pattern on a heat-resistant surface. Apply the appropriate flux to foil, tack key joints and verify alignment. Solder the seams with a suitable temperature-controlled iron, keeping fumes away from breathing zones and using an iron stand when pausing.
Step 7: Add supports and finish safely
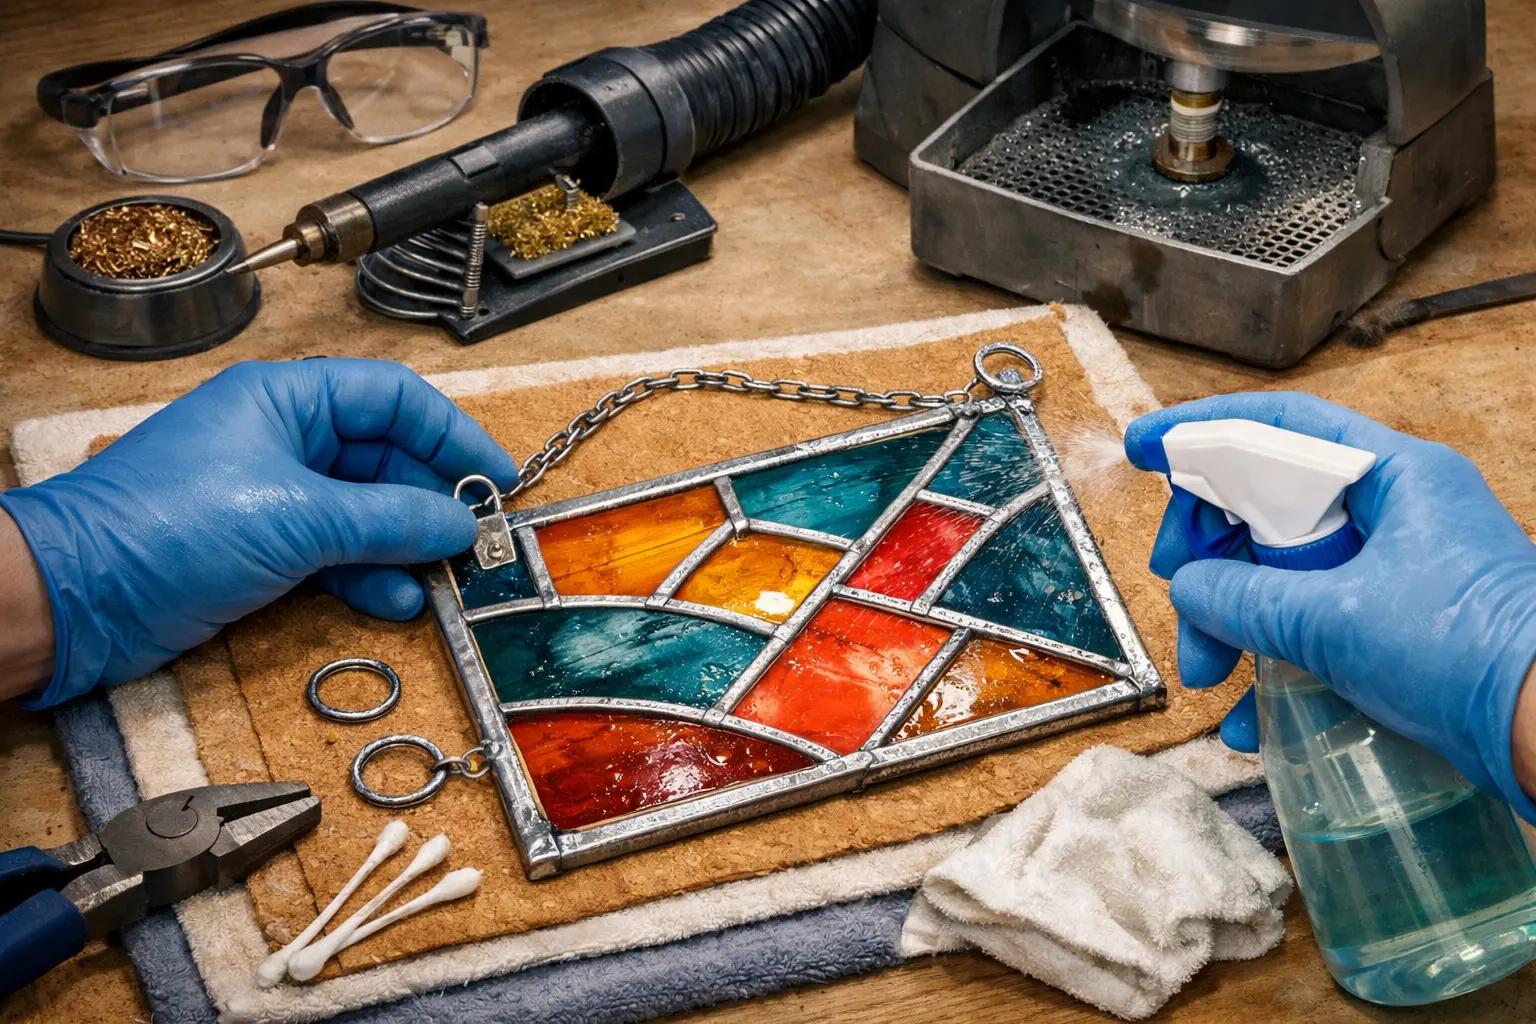
Secure appropriate hanging hardware to reinforced locations, using materials intended for the job. Clean flux residues as directed, inspect every joint and test the hanging support over a protected surface before displaying the artwork. Keep finished lead-containing work out of children’s reach.
How to recognize a good fit before soldering
Lay the dry glass pieces against the pattern. Narrow and reasonably consistent gaps help create clean solder seams. Any piece that must be forced into position should be recut or ground before foiling. The copper foil width must bridge the glass edge and produce a usable solder surface on both faces.
What usually goes wrong in a first attempt
- A glass piece breaks at an unexpected point: avoid repeating an uneven score; work on stable support and reduce overly sharp curves.
- The foil lifts: clean and dry the glass edge, center the tape and burnish fully.
- Solder beads form unevenly: review the iron tip, flux application and steady movement rather than increasing heat blindly.
- The hanging point pulls away: stop, reassess the strength and reinforcement of that connection before displaying the object.
Which tools are worth purchasing first?
A glass grinder is a useful investment for patterns where clean fit matters. For occasional suncatchers, the Inland WizlingCG or Wiz Mini may be worth comparing; for frequent projects or small internal curves, the stronger WizCG and compatible small-bit systems offer additional choices. Check 115V compatibility before ordering. More expensive saws and accessory systems can wait until complex designs justify them.
Compare documented specifications, fit and limitations, or check current Amazon listings. Amazon searches may include different models.
Inland Craft WizlingCG Grinder
First regular-size grinder with a straightforward wet setup
Inland Craft WizCG Grinder
Frequent projects and detailed curves where two included bit sizes help
Creator’s Cutter’s Mate Glass Cutter
Glass scoring with repeatable positioning and reduced wrist movement
Next lessons
If a score is inconsistent, start with cutting glass accurately. If pieces are too large for the pattern, learn the wet grinder workflow. For seam finishing, use the soldering guide and our foil technique guide.
Design for both light and structure
A suncatcher works because daylight passes through some sections more readily than others. Try holding the actual glass samples against a bright window before committing them to the drawing. Highly opaque glass can be striking at the edge of a design, while transparent and lightly textured sheets create a softer glowing center. Consider the finished piece from both sides. A color that looks bright on a white worktop can appear very dark when installed against trees or buildings outside a window.
The lines in the pattern are also solder seams and therefore become part of the visible composition. Decide where a dark seam improves the drawing, where it might interrupt a face or petal and where long thin pieces would be fragile. For a first project, prefer shapes that are easy to hold and to cut with a controlled score. A visually simple design is not a lesser project when its fit, foil and solder are neatly finished.
Manage fit before investing time in foiling
Put the cut pieces on a flat copy of the original pattern before starting the grinder. Label pieces discreetly so that a replacement can be traced without guessing. Compare neighboring edges, not just the outside outline of the whole shape. A small error repeated across several joints can move the outer perimeter substantially. Grind only the part that needs refinement, then put the piece back on the pattern to check the relationship to its neighbors.
Keep a spare section of suitable glass available for the most delicate segment of the design. Breaking one piece should not tempt you to distort three surrounding shapes to fit it. When every segment aligns without being forced, clean the entire set and arrange the work surface for foil. Working one step ahead reduces contamination: cutting dust does not belong on adhesive foil, and grinding slurry does not belong near a soldered joint.
Plan safe hanging points before soldering
The hanging hardware should be part of the original structural plan. A point at the end of a delicate glass spike is not suitable merely because it is the visually highest point of the pattern. Consider weight, balance, the direction of load and how any rings, wire or frame will be attached to reinforced metal seams. Larger objects may require a different support construction from a small ornament.
After soldering and cleaning, hold the piece above a protected surface while testing its balance and the condition of each attachment. Inspect for movement at joins and do not hang a suspect piece at head height or over fragile furniture. If you are uncertain about appropriate hardware or structural reinforcement, ask a qualified stained-glass instructor to inspect it before it is installed.
Set expectations for finishing and display
Different patinas change the look of solder lines and may interact with foil backing choices under clear glass. Follow the finishing-product directions, remove chemical residues safely and do not treat decorative wax as a substitute for cleaning. The final appearance depends on the solder surface, washing, handling and where the piece is displayed. Taking a photograph against daylight can reveal tiny gaps or unwanted smears that are hard to notice on the bench.
Stained glass is decorative art, not a food-contact product. If lead-bearing solder was used, keep it out of reach of children and away from frequently handled surfaces. Clean the workbench using appropriate methods and do not carry dust on clothes into living areas. The CDC explains why stained-glass work can be a lead-exposure pathway; making a beautiful object and keeping the workspace hygienic are parts of the same craft.
Sources and manuals
- Delphi Glass: Getting Started in Stained Glasswww.delphiglass.com
- Delphi Glass: Foiling Glasswww.delphiglass.com
- CDC: Lead in Jobs, Hobbies and Other Activitiescdc.gov
- Inland Craft: Grinder Instruction Manualsinlandcraft.com